
Have you ever wanted to make bobbin lace?
I have! For a long time. There were a few things stopping me though.
Equipment, mostly. I could tell very many bobbins were needed, even more pins, and also a specialized foam pillow thing of some sort.
That plus the complete conceptual opacity of what compromised a pattern kept me from even trying it out for a very long time.
Last year, I finally bought myself a bobbin lace pillow, and decided the bobbins would come later. And how hard could a pattern really be?

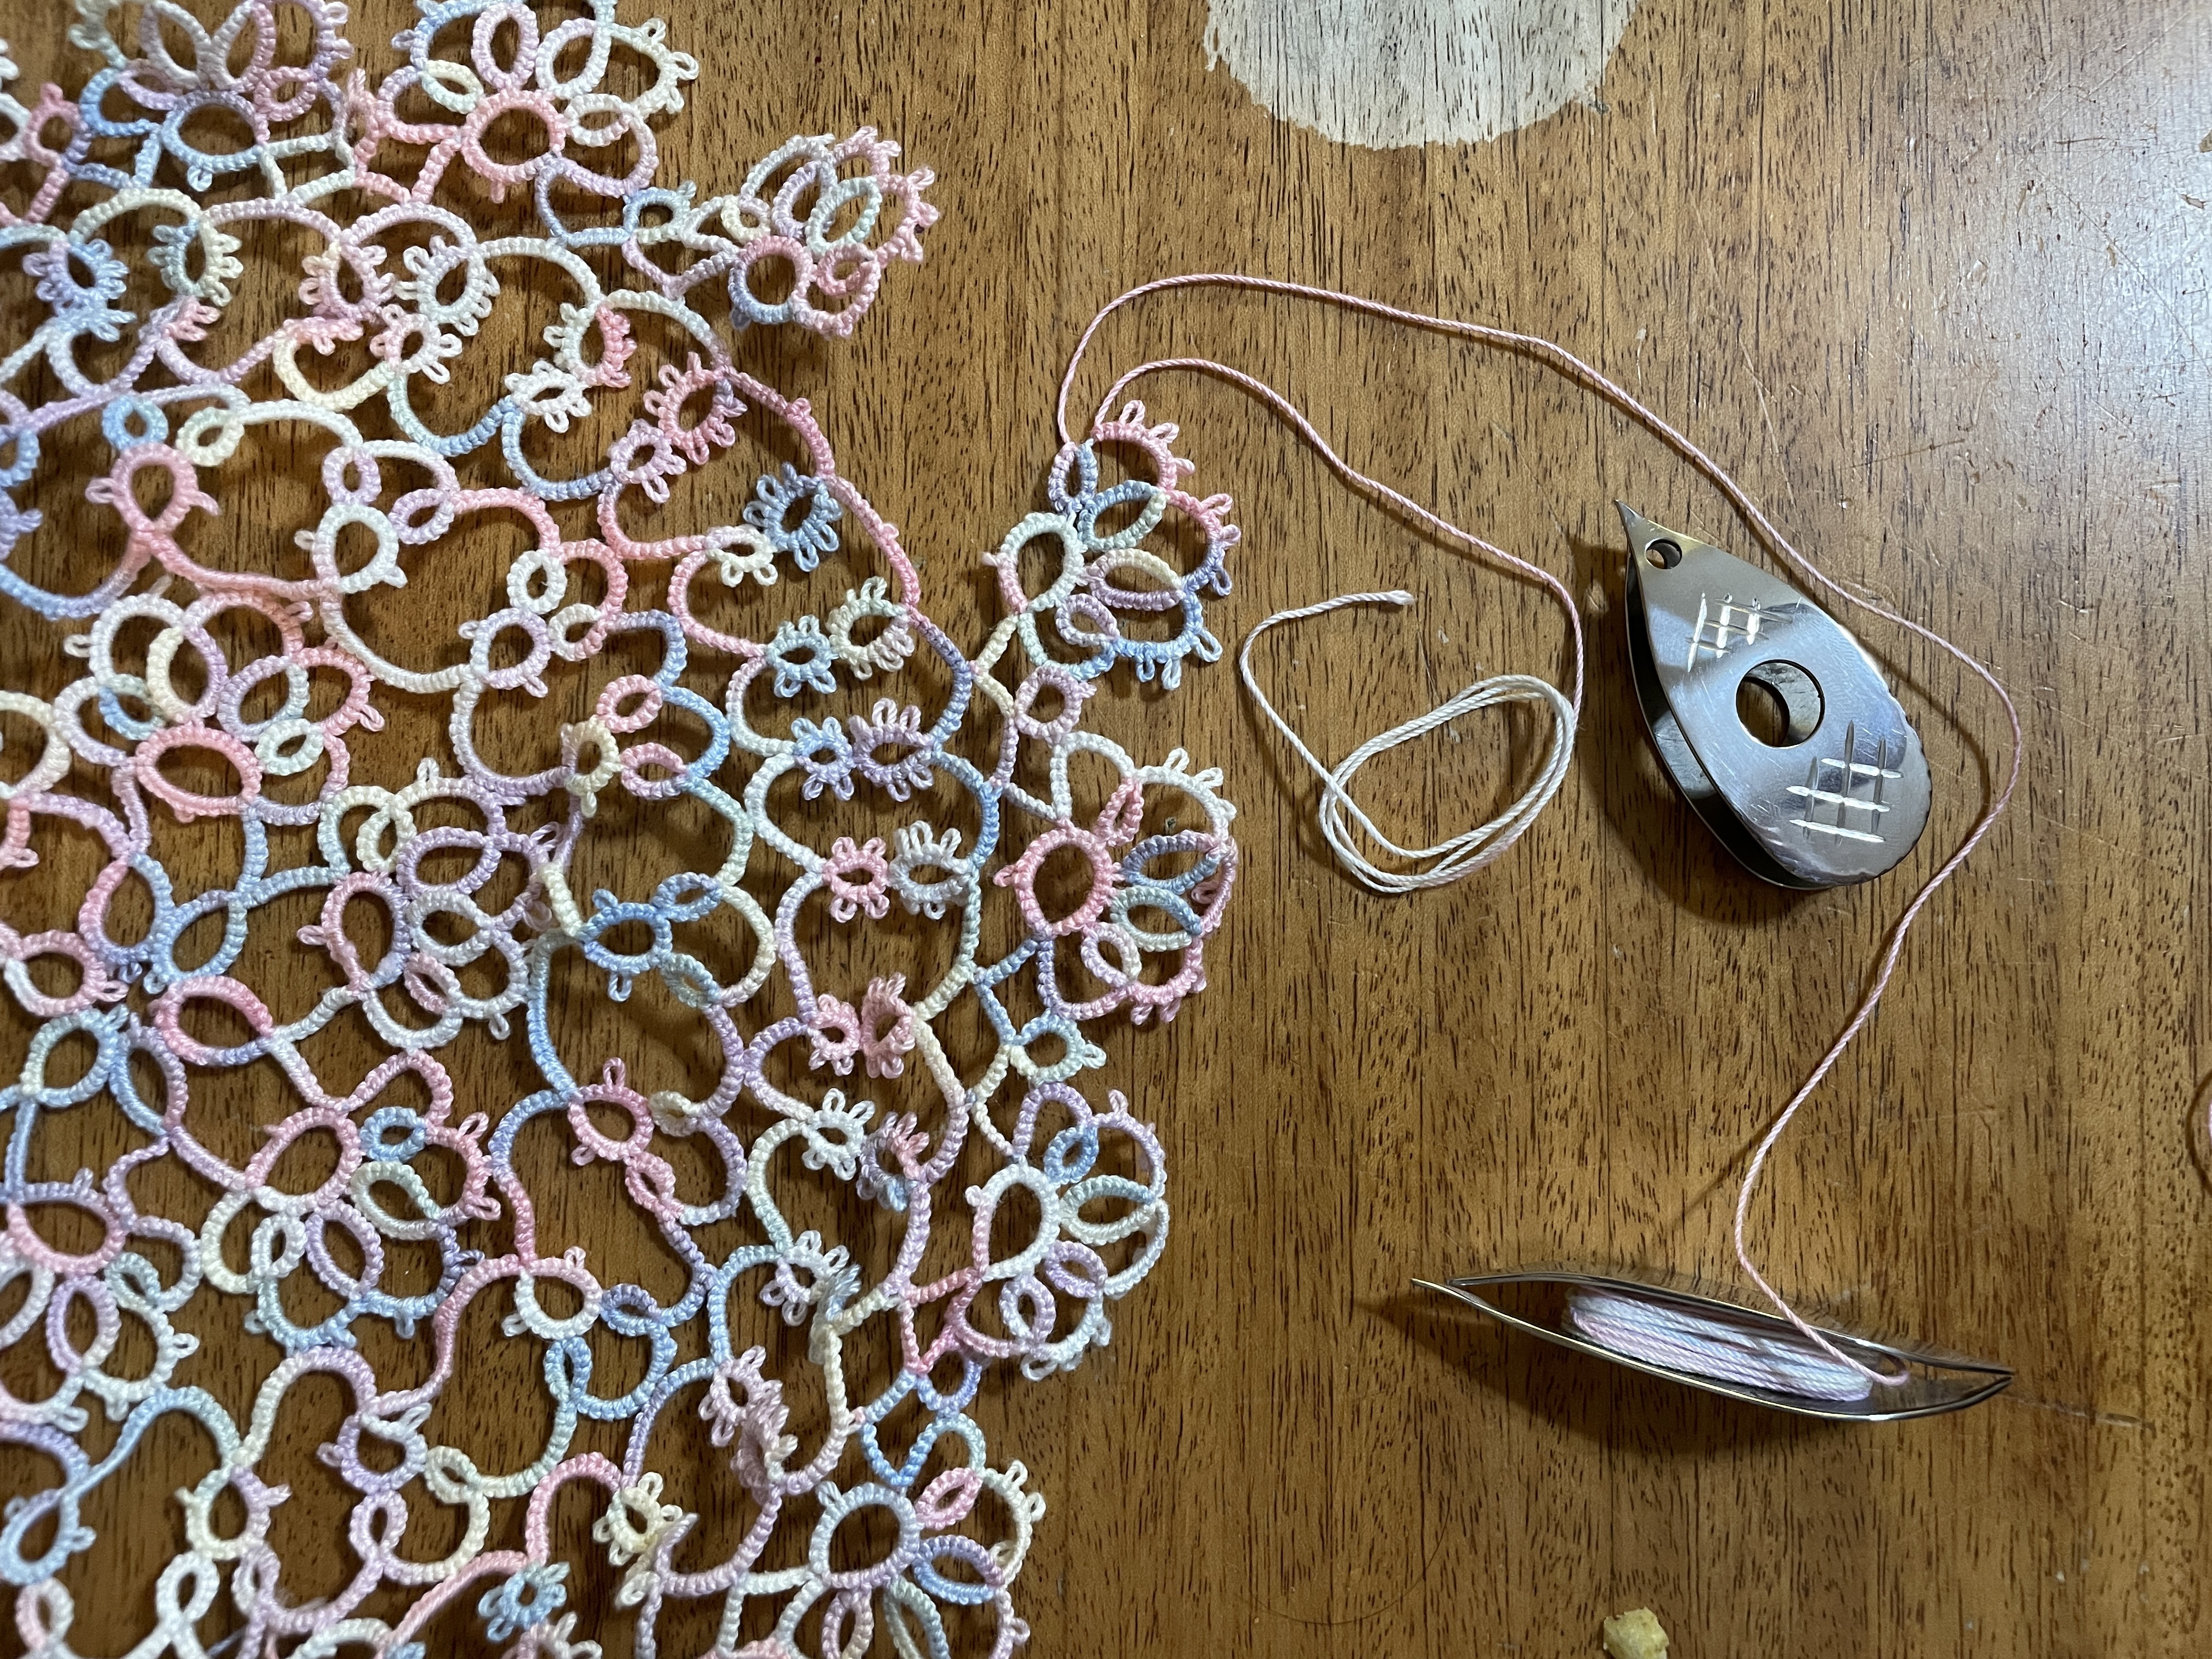
Behold! Bobbins!
My local big box craft store had some colorful clothespins, which was nice to keep pairs of bobbins separated for my first project. I also picked up the smallest pins they had, which were these glass-head sewing pins. The thread is size ten crochet cotton I had on hand due to tatting.
And I had no idea how to pick a first pattern, but I got lucky and picked rose ground. "Lucky" in that it was a ground and not ground plus other things.
The instructions I followed were from howdidyoumakethis.

And it turned out well!
I started and ended improperly, but figured I would leave that for later. The clothespins were a little frustrating, as they didn't actually grab the yarn very well. And I could see that becoming an even larger problem with smaller thread.
Then I had to move apartments. So everything got packed up and a lot of things didn't get fully unpacked till much later. You know how it is.
Within the last month or so, I decided to take bobbin lace back up again.
I invested in actual bobbins, more appropriate pins, and just picked the first pattern I liked. Which was spider and line ground from Jo Edkins' website.

Many observers may notice the spiders look awful. Especially keen-eyed ones will note that every spider is done in whole stitch, instead of cloth stitch, so they were having a lot of trouble closing. Plus there are a few too many twists in the legs for my preference.
At this point, I was celebrating completion of a real pattern. I also learned that Jo Edkins' website is an incredible resource for people like me who want to throw themselves at a thing until it starts working. There are animations and clear explanations and great diagrams for everything I needed to know.
My learning process is very much "let's just see how far we can get", and "we'll learn what we don't know very quickly along the way". With fiber arts, this generally works well. There is of course a lot of tangled thread and unstable fabric created, but hands-on experience is incredibly valuable, and more fun for me than reading reference information.
With the confidence of an unseasoned beginner, I purchased a pattern for a mat (MyrtleAndEve on Etsy). Turning the corners was easy until the last segment, when I realized that my haphazard pin-pushing made it impossible to neatly flatten them into the cushion. So I learned that pins should be placed a little more neatly than I had been doing.

In the end, I was rewarded with a non-squared square.


Still unsure how to finish pieces, but it turned out pretty well! And using size 50 thread. The main thing I learned from this was "don't use a white pricking for white yarn".
I feel like a much more confident bobbin lace beginner now.
Renulek's Rose #3
Finished product first, of course.


Is now a good time to mention that I used 600 pins, and still missed about a hundred or so picots?

It took a very, very long time to get all the pins in. Thankfully, unpinning everything went much faster.
Progress photos below!
The first round completed:

The second round. The chains aren't as tight as they should be, and are flopping around too much. This will be a recurring theme, and definitely something I'll be paying attention to in future pieces.


You can see that the doily gets more and more wobbly as things progress. I think it would have laid more flat if I had been neater with my chains, ie pulled them a lot more tightly. The last round being so flat on its own actually helps the flatness of the overall doily.
I had a lot of fun with this doily. I actually started the same pattern, but in size 40 thread. I'm in the middle of the second round already, and am looking forward to the tatting! I will do a size comparison between this size 10 thread doily and the one I'm working on now, as I'm curious how much smaller the doily will be.
Unflipped/non-flipped chains are the best!
I recently switched to only doing unflipped chains when I tat. This is not my idea -- I got it from this YouTube video by Sparrow Spite.
There are going to be quite a few words in this post. Enjoy!
Why would we want to not flip our chains? Seems kinda weird.
Unflipped chains basically mean you stay on the front side of the tatting the entire time you're tatting (unless you're working a two-shuttle pattern).
And you can tat faster. Unflipped chains mean you don't have to reverse work nearly as often, or adjust the thread coming off the shuttle as often when switching from rings to chains or back, since you're reversing the shuttle that is used for the stitch thread.
Reversing work for me is kind of confusing, and I usually end up doing it properly, but I still sometimes twist something around, or mess up the curvature of a stitch. Tatting diagrams are top-down, and rotating them in my mind to line up with the upside-down tatted piece in my hand can be a lot!
I've also been trying to pay attention to the front side and back side of my work. So I'm attempting to nest chains properly and place picots between the right halves of stitches, all according to if I'm working on the front or back of the piece.
It's just a lot to track and execute neatly and quickly. And unflipped chains make tatting logistically and cognitively easier for me.
If you are intimately familiar with tatting, here's a link to the conclusion without all the in-depth explanation. You could also just watch the section of the YouTube video linked above.
Tatting stitches have directions -- top versus bottom.
Stitches will always curve, because of their structure.

The bottom of each stitch has two legs, and those grab on to the core thread (orange). The top half of the stitch is the cap that the legs go through, and how the stitch thread progresses to form new stitches. The top half of stitches always faces outwards, as the top half is wider than the bottom.
This is important because sometimes after completing a chain or ring, you will have to reverse your work in order to create the next chain or ring in the right orientation with the right curvature.

In the above diagram, we start with ring 1. We reverse work for chain 2. Reverse work again for ring 3. Reverse work for chain 4.
But we do not reverse work for ring 5, or again for chain 6.
And then we reverse work for ring 7.
The lighter purple indicates the top of the stitches (or the outside curve), and we have to pay attention to that as we follow this diagram. If we reverse work, or do not reverse work, at the wrong time, our chains will curve the wrong direction, or our rings will be on the wrong side of the chain.
The second item in play is flipping versus
not flipping stitches. Traditionally, every stitch is flipped (except
in the case of split rings or split chains).
To make a half stitch, you first make a half hitch with the shuttle/core thread (yellow):


There are two types of half stitches -- the first half, and the second half. Together they form a full stitch. The tops of the stitches are on the left of the core thread, and each full stitch has two "legs".
Here are two full stitches in orange, on the front side of the work. First half, second half; first half, second half. They're farther apart than they should be, to demonstrate that they're just loops on a core thread.

But what if we didn't flip our stitches?

This is the same order of half stitches -- first, then second, just unflipped. You will notice it looks very different.
Other than the stitches being in yellow (shuttle thread). the tops of the stitches now are to the right of the core
thread, and though there are four stitch legs, there is only one visible
top stitch. It looks like a loop, a full stitch, then a loop.
What
happened? Well, we didn't flip our stitches, so the loops are
effectively reversed. And it therefore looks like we're on the wrong
side of our work.
If we do not flip our stitches, and also reverse the order of half stitches (and do not reverse
our work), we get stitches that look similar to flipped stitches, but
on the other side of the core thread. Two wrongs make a right, kind
of.

See? Two full stitches, each with two legs, and one top. We just had to do the stitch halves out of order.
A side-by-side comparison, with stitch halves numbered:

Can we go from ring 1 to ring 2 without flipping our work?
If we flip our stitches as usual for the ring, do not reverse work, and go straight into the chain, we would end up with something that looks like ring 5 and chain 6, ie the curvature of the chain would be backward relative to the ring.
A natural consequence for not reversing our work.
However, we now know that not flipping our stitches can be used to create stitches that look like the right side of our work, with the opposite orientation to the core thread!
A modified version of the original diagram:

We start at the same place. Blue numbers indicate flipped stitches. Orange indicate unflipped stitches (that 5 should be a 6, oops).
We do not have to reverse work until we finish chain 4 and start ring 5, and one more time between ring 5 and chain 5.
For this particular diagram, that means we halved the number of times we have to flip our work!
And this is a two-shuttle diagram (rings on both sides of the chain). For one-shuttle or shuttle/ball diagrams, using unflipped chains means you never have to reverse work. Which is awesome!
That concludes this post. It seems weird, but unflipped chains have made my life easier. Try it out on a small motif and see if you like it as much as I do.
Sunset Carousel: done at last!
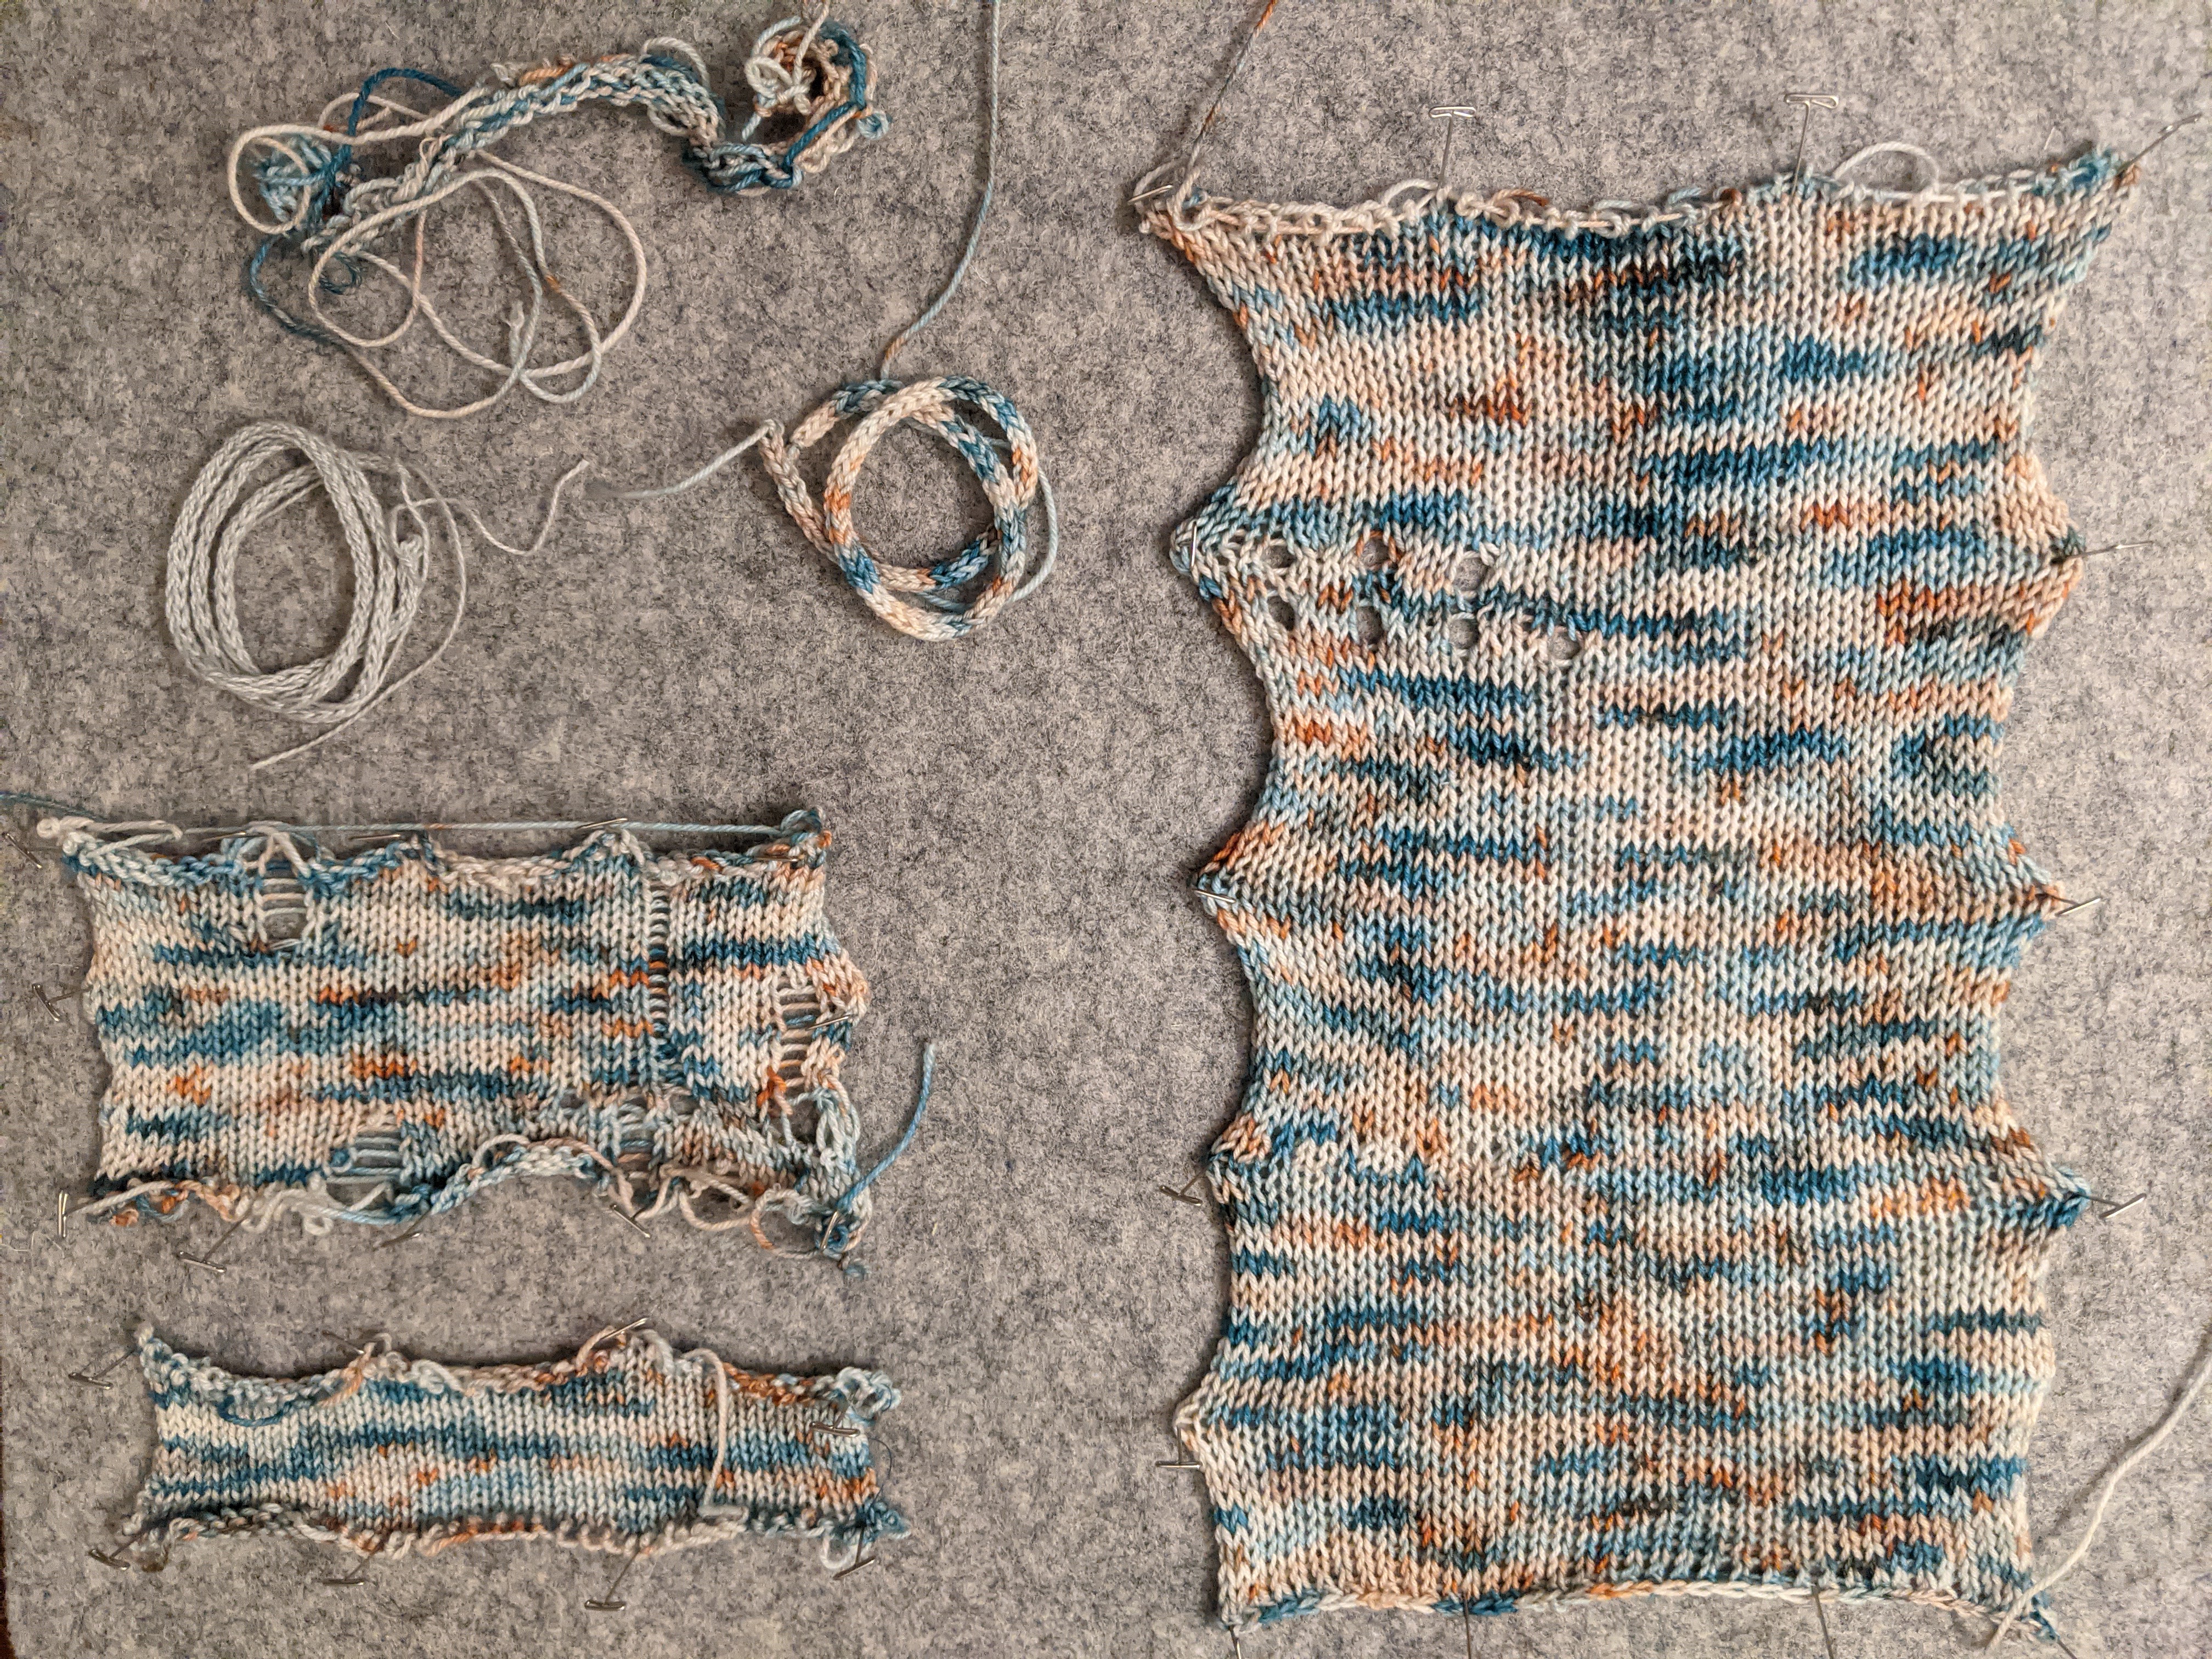
This shawl was done a while ago. I finished the knitting and washing and blocking in early February, actually!

I love how it turned out. It's slightly ruffled along the curved edge, and looks nice when worn over the shoulders or around my neck.
The shawl is surprisingly warm for how thin it is.
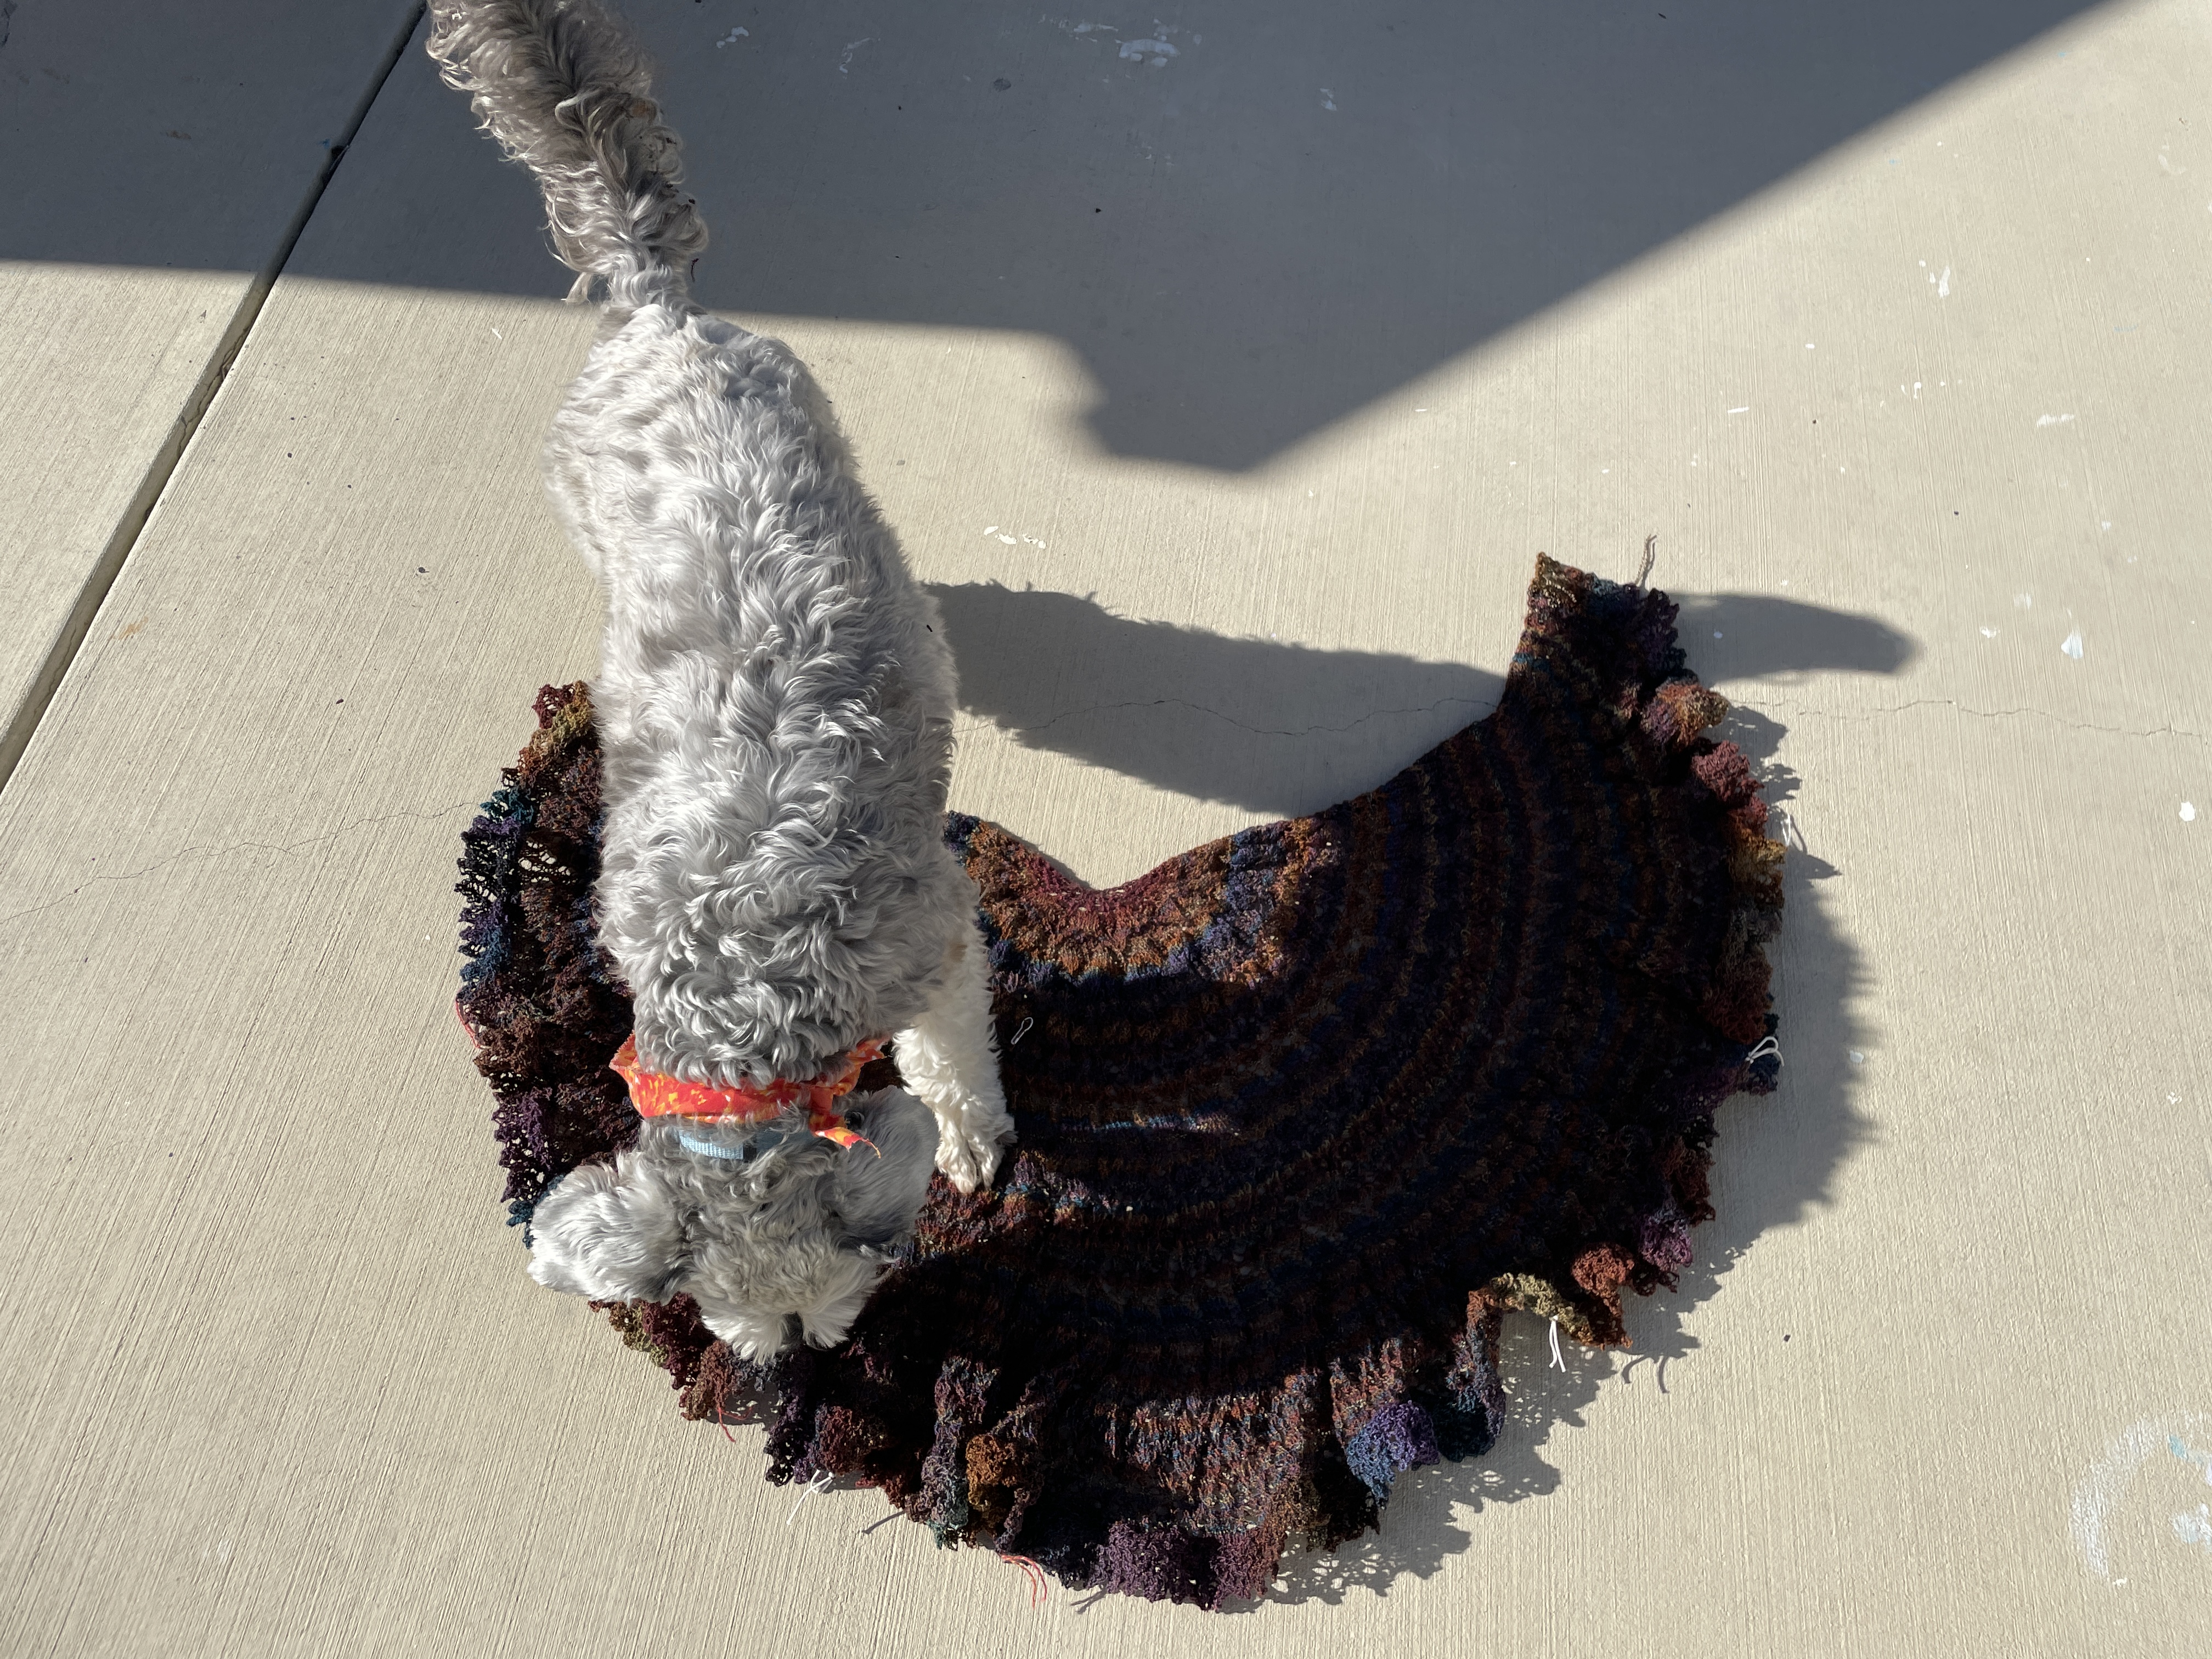
Before blocking pictures, featuring my landlord's very cute and curious dog.

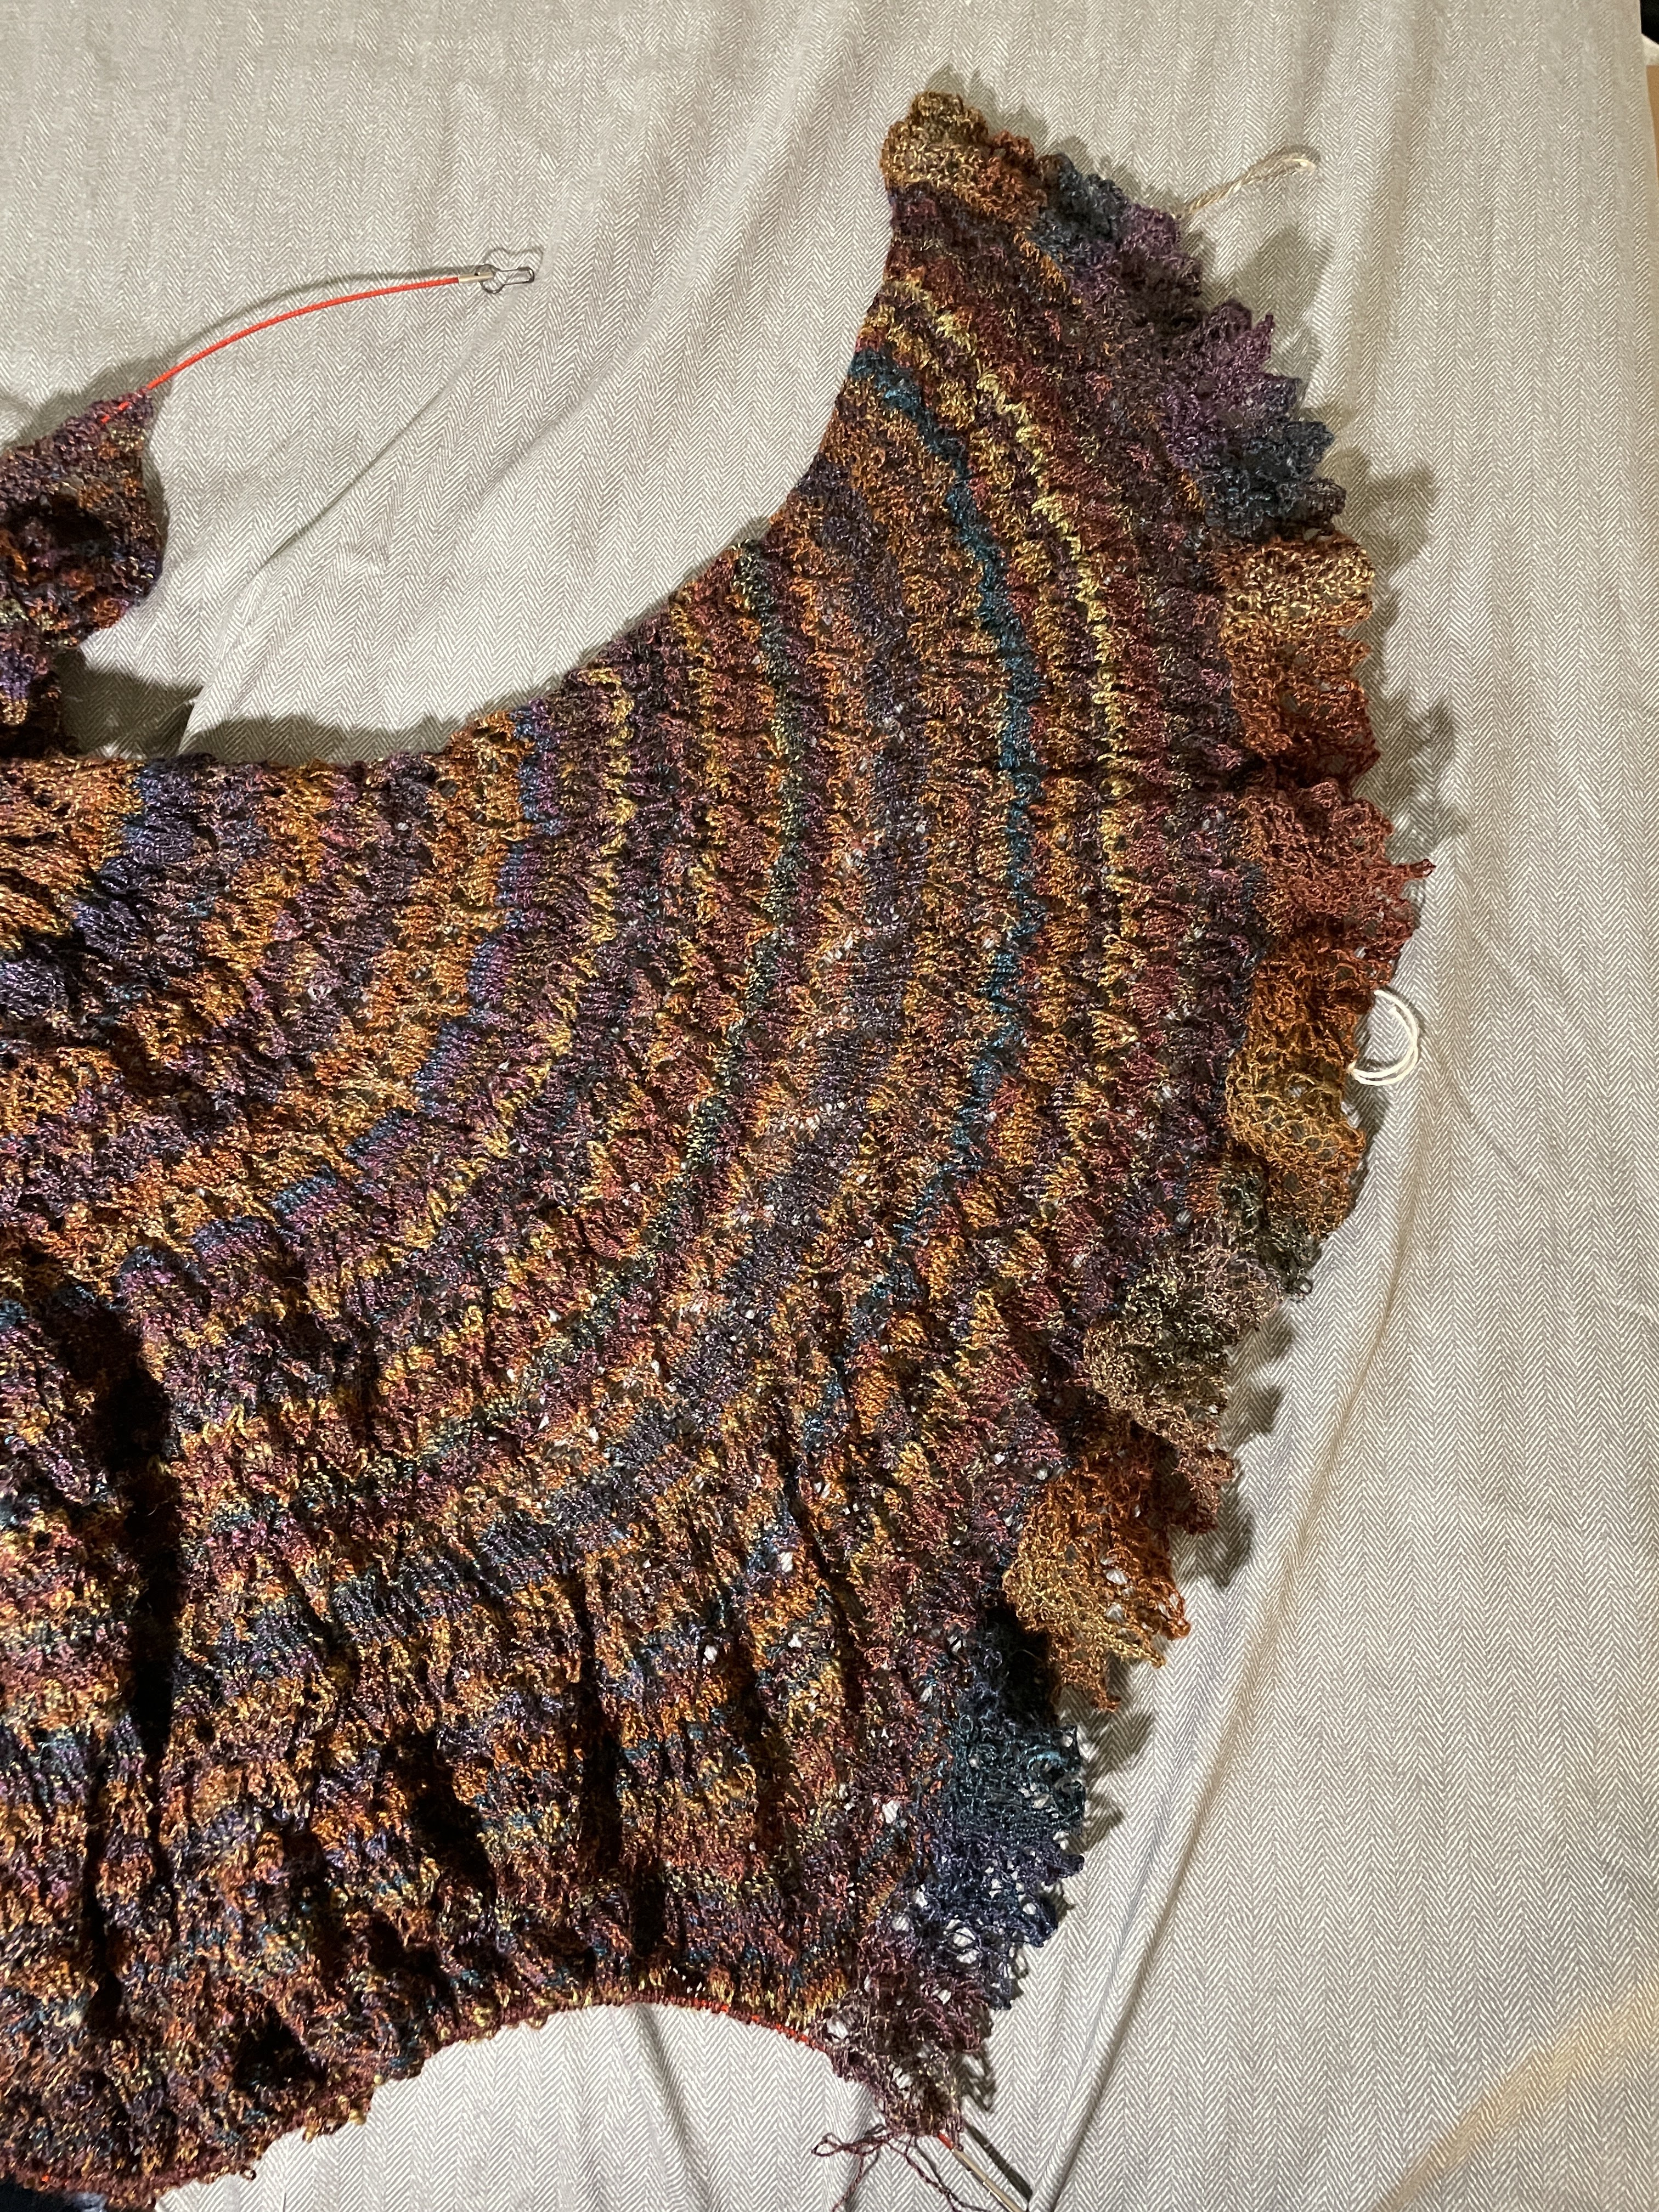
You can still see the markers on the border. I was tracking how many border repeats I did per day to keep my motivation up.

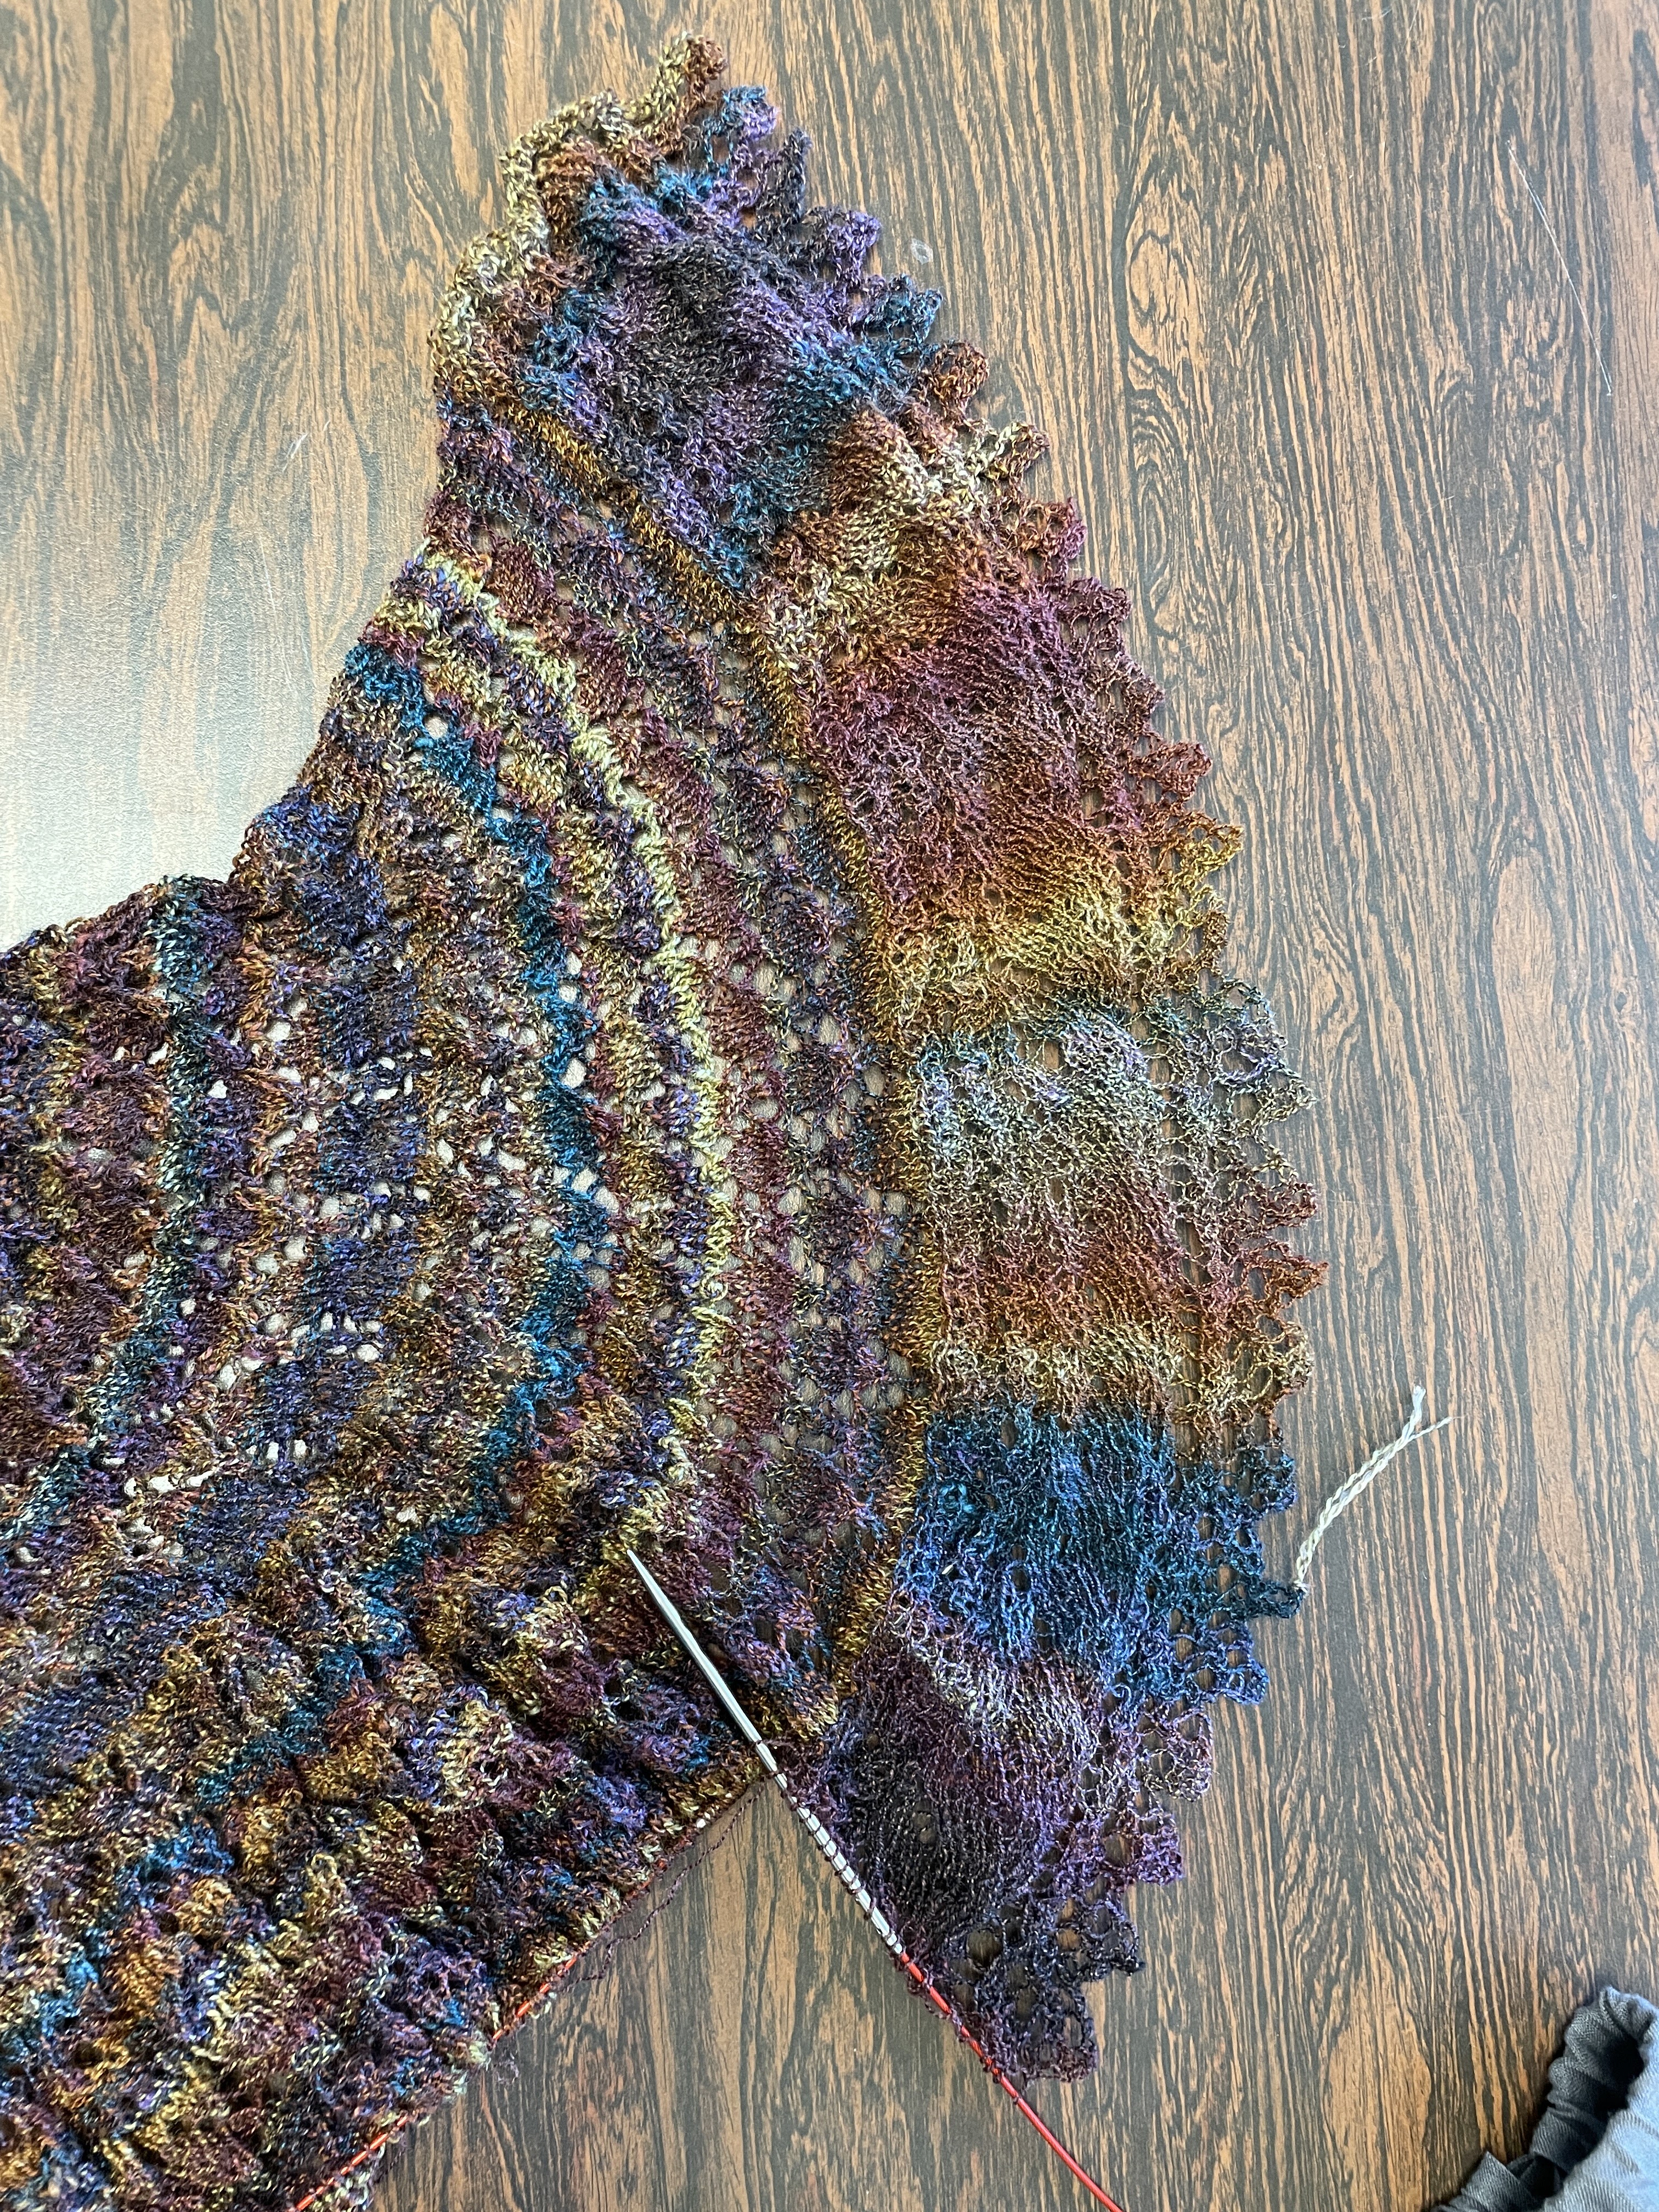
Hard to tell, but it's very scrunched up and in need of a nice stretch!

Sunset Carousel: the shawl that still isn't done
Well. It's been a week and I'm still knitting away. By my estimates, I still have about 12 hours of knitting! I am doing a different border than the pattern calls for, but after adding a whole new section to the shawl, swapping in a different border doesn't seem all that heinous.

*I actually shifted the first portion by one row so the YOs line up a little nicer.
Sunset Carousel: the shawl that never ends
Semi-circular shawls are a beautiful trap. They start off with 8 or so stitches per row. Not bad at all. Very quick rows lead to a certain sense of accomplishment. Then the number of stitches per row increase, of course, to create the half-circle shape. But you think to yourself, "ahh, this is fine, I am a patient person, I am enjoying the knitting process!"
And then the rows start taking five minutes to complete. Perhaps even ten. Then twelve... I am currently up to a 25 minute row. I am not going to count the number of stitches per row right now, as it would just make me sad. And the stitch count will double at least once more before I'm done!
On the bright side, I'm using quite a lot of yarn!

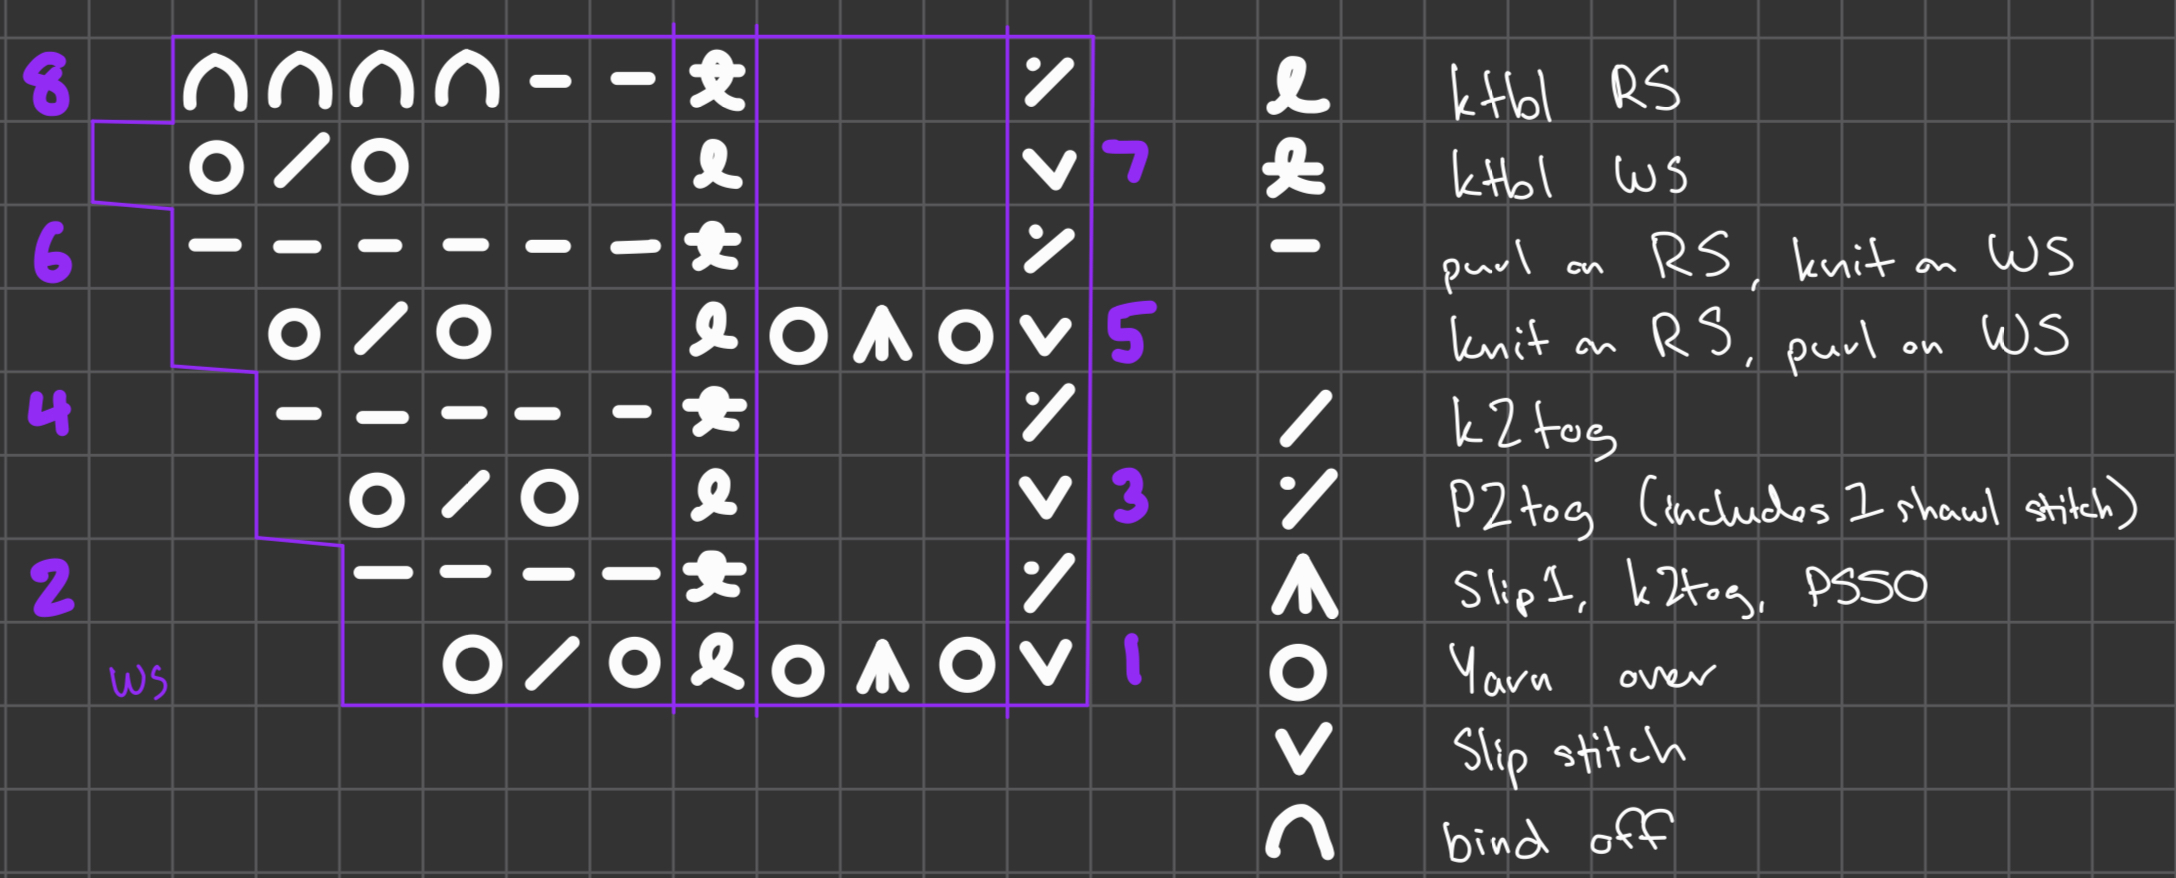
This pattern is very good. I like how the lace looks, and the charts are very reasonable (speaking as someone who previously did not enjoy working from charts).
I was hesitant to start this pattern because I have never knit from a chart before. I have literally sat down and hand-written instructions from a chart rather than read the chart as I knit. But I decided this would be a good project to just learn to knit from a chart. And it wasn't that bad!
I have learned to love charts. I am even adding an entirely extra
section between the second and third charts to extend the shawl and use
more yarn. This chart was easy to visualize and adjust because it was a chart. A written pattern would have been a nightmare to adapt.
But now I am currently forty rows from the end, and I am suffering. I should have been done knitting by now, but because I added another chart, I added quite a lot of knitting for myself.
I'll have a completed shawl eventually.
Chain-plied mystery fiber, from a plying ball!

Chain-plied, of course, as it is my favorite plying method. But this time, I plied from a plying ball!
I only had a vague idea of what a plying ball was before yesterday. I knew some sort of vague hand-wavey explanations of how to create one, but hadn't made my own just yet. But yesterday I found myself with no extra bobbins and a single that wanted to be plied up, so I made a plying ball to free up my bobbin.
If you've ever chain-plied from a bobbin and also wound your own ball of yarn, you are fully qualified to wind your very own plying ball for chain plying.
Here's the very start of mine, winding the ball directly from my spinning wheel:


Winding it tightly also helped keep the energized singles from tangling. As you can see in the ball-in-progress picture, the singles really want to tangle up.
I kept the brake band on my spinning wheel while I chain "plied". That helped keep the bobbin from running wild.
Plying was very fast. Usually when chain plying, I end up needing to use a slower speed on my wheel to form the chains. But when using the plying ball, I found myself using the same speed that I used to spin the singles.
The yarn was slightly underplied initially.


I am very happy with how the yarn turned out, however, there's not very much yardage!
I cast on a hat, and realized that I would have enough for maybe three-quarters of a hat. Definitely more than half a hat. But also definitely not enough for a full hat.
Not sure what my plans for this yarn are anymore. I was really looking forward to an aran-weight hat!
The yarn is currently in time out for not producing enough yardage for a hat.
I bought a Silver Reed SK10 and SR10 knitting machine!
I've been considering a CSM (circular sock machine) for a while, but my budget has kept me from buying one. I really want the ability to crank out sock snakes and hand-finish the heels and toes. I discounted flat-bed machines because how would you knit in the round on a flat-bed machine?
And then I stumbled on a post that said you can in fact knit in the round, or, knit tubular as machine knitters are more likely to say, on a flat-bed machine. The secret? A ribbing attachment! (Or a double bed machine, but those are fairly rare).
So I started the hunt for a knitting machine and ribbing attachment. I found the perfect machine for me a few weeks ago. Here it is knitting a ribbed cowl:

My requirements were a machine plus ribbing attachment, in working order, with everything needed to start knitting (minus a sponge bar). Also something local, because shipping for these machines gets expensive and can destroy the machine. And of course, something in my price range!
I searched through Craigslist, NextDoor, Ravelry (the machine knitting group has a great thread to evaluate machines for purchase!), and finally Facebook Marketplace, where I found a listing for a machine that fit all my requirements. However, it was three hours away from me, and had no built-in patterning ability. I decided that lace and colorwork were nice things to have, but not requirements for me. After all, I wanted a CSM for cranking out sock snakes at lightning speed, not fancy patterning.
So I decided to buy the machine. The seller was kind enough to demonstrate it working and give me a few pointers while I was there to pick it up.
I did not set it up as soon as I got home -- I was quite exhausted after driving over 6 hours through traffic.
But first thing the next morning, I set it up and started figuring out how to use it! This is the first picture of it in my apartment:
 |
| SK10 + carriage + cute row counter |
One of my favorite parts about this machine is the row counter -- it's seriously so cute.
My goals were: figure out regular flat knitting, figure out ribbing, and then figure out tubular knitting. I ended up slotting "deep clean" into that list as well. It may not seem clear from this picture, but it was in need of a thorough cleaning. I made a video about the process here: YouTube.
Figuring out the basics of machine knitting were a little difficult since I didn't actually have the right cast on materials. I ended up using the ribber cast on comb in a way that it shouldn't be used, but eventually I got some knit fabric! (the picture shows some stitches haven't knit off properly -- ignore that).
 |
| Improper use of cast on comb... |
My first few swatches:
 |
| More and more success, from left to right. |
 |
| Manually-selected tuck stitch! |
I was able to figure out ribbing fairly easily, though tubular knitting took a little longer.
Tubular knitting on this machine is a little different from most modern machines, where the two carriages lock together and move as one unit.
There are four steps for every row of tubular knitting on the SK10/SR10. Written explanation below, video demonstration here: YouTube.
Set up: both carriages on the same side, let's say the right side. Main carriage is set to slip in one direction -- since we're starting on the right, it will slip from left to right. Ribber carriage is set to raise needles in one direction without knitting, and lower them in the other. Since we're starting on the right, we will set the carriage to raise needles from right to left and lower them from left to right.
Right to left:
The first pass is the main carriage across the main bed -- the stitches knit as usual. First half of the row is complete. The next three carriage passes are how the stitches on the ribbing attachment are knit.
The second is the ribber carriage across the ribbing attachment -- the needles are raised up but do not knit (if they lowered/were knit here, the stitches would just drop off).
Left to right:
Now the main carriage moves across the bed, slipping all stitches. This lays the yarn across the ribbing attachment's needles.
And finally, the ribbing attachment carriage moves across and knits stitches, leaving the needles lowered in preparation for the main bed's stitches to be knit in the next round.
The manual does say all that, but not very well, I think.
But anyway -- I've now mastered the basics of this machine and look forward to making some sock snakes!
I've tackled hats already but for some reason I'm hesitating with sock snakes, even though they're pretty much the same concept:
 | |||
| Machine knit, hand finished |
By the way, I wrote up the hat pattern: Ravelry. It's available for free!
Hopefully I'll have completed some sock snakes by the next time I post. I've ordered some very pretty sock yarn from Etsy that I'm excited to share. Counting the days till it arrives!
A venture into spinning fiber into yarn

 |
| Squishy squishy roving! |
 |
| Yarns #1, 2, and 4 |
 |
| Yarn #3. Well, it was supposed to be a yarn. |

 |
| Yarn #5, plied and caked. |
 |
| Swatching yarn #5. Only used half. |
Thrifting for yarn, but in sweater form!
I found four pieces of clothing (two cardigans, one sweater, and a dress) that fit my criteria. I was hoping to find more, but four turned out to be quite enough!
You see, yarn is quite expensive. I knit quite a bit, and that requires a sizeable stash of yarn. When the amount of quality yarn it takes to knit a hat hits about $25, the amount of yarn I would need to make a shawl or sweater makes me uneasy (hint: easily over $100).
So I thrifted some clothes and unraveled them. I pulled each item apart at the seams, wound each resulting piece into balls, wound those balls into hanks, washed the hanks (thrift stores are not known for their cleanliness), then wound the hanks back into balls.
Doesn't sound like too much work, right? I was eager to start, envisioning a few hours' work to produce lots of cheap yarn to play with.
It's been about a week, and I've so far only processed three of the four items of clothing. I didn't make great choices picking these items. The dress was made of super-fine yarn, but it was a beautiful orange, and 100% alpaca! For $6. I couldn't say no...
But unraveling it was a nightmare. It had a few rips and tears that were clumsily patched, and the yarn tangled easily. I spent more than half my time picking out knots and joining broken threads, rather than actually unraveling it.
And one of the cardigans was made of a one-ply wool blend that was already pilling before I bought it. That yarn quite enjoyed breaking and producing vast amounts of fuzz.
But I think it's worth it. I've unraveled, washed, and balled up about 3,500 yards so far. And the total cost has been less than $20, not counting the hours I voluntarily dedicated to this task.
Pictures and general process for the dress below (sort of skips some steps in the middle!):
 |
| Original dress. 100% alpaca! |
 |
| All unraveled, wound into hanks, and soaking. |
 |
| Hanging up to dry. Note the tiny, tiny, center skein. I think it was a cuff. |
 |
| After drying, a clean hank of yarn! |
 |
| The fruits of my labor, 207 grams/1725 yards of beautiful alpaca wool. |